Wednesday, 31 August 2016

The Aussie Digger

"If I had to take hell, I would use the Australians to take it and the New Zealanders to hold it." -Erwin Rommel.
 
Well thankfully we're not going to have to take hell (I haven't yet found a DOOM-esque demon in 6mm) or hold it because I haven't got any Kiwi minis just yet... emphasis on "yet" ;)

However, if we have to take hell, we're halfway there - why?  Because I have some Aussie troops painted up and ready to get stuck in!

Here's my latest build for infantry - these guys were actually completed before the USMC troops, however that is only because I started these after putting the USMC on hiatus with the personal stuff that had to be resolved first.


I found the camo on these to be quite a challenge - AUSCAM is a very difficult camo to paint at this scale and like the Aussie armour you can make it either dark as a 'fresh' uniform, or use lighter colours to show a more 'used' set of cams.  The two examples here give an idea of just how much difference you can have between any sets!  I should also know as I have my own gear as part of my issue.

We also have some more 'American' style cams for our more specialised troops - such as in the image with the USMC guys, where I assume that 'Old Mate' in the middle of the image is probably an operator of some type.

In the end, I decided to 'honour' the look after a few test models using "German Camo Beige" as the basis... instead, I went with "Khaki" from Vallejo as my base paint - to give the idea of the multiple green blots (often called "Bunnies and Hearts" because of the way the camo dots are shaped) and did some light dotting of Mahogany Brown and Black-Grey in a few select areas of the miniatures.

Some of the minis also have 'Russian Uniform' green helmets - our helmets themselves are a dark green similar in tone, so I did a few troops with that for mixture.


The second group shown below includes the very first test mini I did... he's the poor sod who looks like he fell over in mud - that... well, story behind that.  You see, when I was testing the cam design, I accidentally smeared a whole brush of Mahogany Brown over him when I finished... once I had got over my initial 'have a small hissy fit about crapping on the work I just did', I looked at the brighter side and decided to have it tell said story.

They are meant to be fighting in a muddy area, so it would not surprise me if one or two of them had a tumble!

So, I let my inner Bob Ross out, and came out with a reasonable recovery ;)

Thank you Bob Ross - you are one of my many Spirit animals.
Others include Chuck Norris, Honey Badgers as an entire species; and the entire "Death-continent" that is Australia.


This is what they look like at 'Gaming Height'
The models I used come from the following two packs produced by GHQ:
GHQ French modern infantry - http://www.ghqmodels.com/store/n562.html
and
GHQ US Modern Infantry 2001-2014 - http://www.ghqmodels.com/store/n570.html

I have only one real gripe with both of these packs - so GHQ, if you're listening... "Why do you have to add so many machine guns and sniper rifles to your basic riflemen packs?"

Seriously, my French have more sharpshooters than there probably are in a whole French Divison and my US soldiers are using LMGs and Laser Designators as their standard issue weapons haha!  (Seriously though, an extra rifleman pose in each would be a blessing even if it meant a reduction in number of Laser Designators/ Snipers) 

Anyway, I did the best with what I had, and managed to get about six sets of troops, plus spares for weapons teams, so I'm not complaining too much - although an extra pose of rifleman or two would be a nice addition.


Finally, some people have been asking what I use to make my models - as my painting has been deemed "Not bad out of ten" by the community.

So folks, I present to you what I use! Oddly enough, while I think GW's models are okay - but wildly overpriced for what you get... there CITADEL gear, back in the day, was worth every overpriced cent!

The Citadel pliers are beasts, and I have never had any issue with them.  The Citadel brushes are also, hands down, my absolute favourite for painting as they are just so flexible with what I can do with them (and I treat them pretty roughly, so they can take a beating!)

The Army Painter masterclass fine tip brush you see is a replacement for my GW one, as when it died it's replacement was a stupidly high priced amount... I kind of need my other kidney still, so I couldn't afford to pawn it off, but the Army Painter brush is working brilliantly as well.

I also use Jeweller's files of different head types, and good old toothpicks for mixing paints/ testing colours.

Finally, I do not use anything fancy to hold my models, just my good old fingers... which have seen more than their fair share of superglue, paint and assorted scrap metal pieces.  I find the ability to be so close to the brush helps me to judge just how hard I am pressing a brush into the model, allowing me to better judge what kind of force I need.

Hope you find it useful!


Digger Drivers

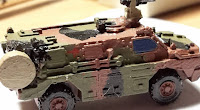
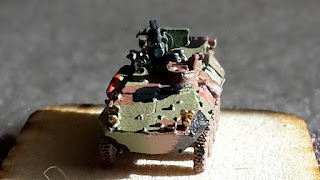
Well I have a bunch of photos of my different vehicles, so I thought I should put a few of them up before I go on!  I have two vehicles totally completed for my Aussies so far - an ASLAV-25 and a Bushmaster.  The vehicles look good originally, but a light wash with "ARMY PAINTER STRONG TONE" wash has really brought the completed vehicles to life!


These shots are of the different ASLAV types I have...
I currently have four ASLAV-25's (the cannon armed versions) and sixteen ASLAV-PCs (the .50 cal armed vehicles.

The ASLAV-PC's are the modifications I spoke about earlier, the CinC LAV-C hulls with GHQ Stryker remote weapon systems.

This is the completed Bushmaster - the photos below really show the difference the "Army Painter" strong tone wash has provided to the model.  The first photo shows the model without the wash, the other two have the wash.

Even in the slightly different light conditions the difference is distinctly noticeable... it finally has that "light sheen" look Aussie camo seems to have on most vehicles!


Anyhow, hope you liked these shots - the next post is the Aussie infantry I have done to date!


Monday, 29 August 2016

Desert DevilDogs!


 Well another day down and I seem to be on a bit of a roll with the minis!  A few days ago I showed some nearly complete US Marine Corps soldiers on the 6mm Facebook page (link in the right tab) and am pretty happy with the final product, but not so happy with the photos - so I went and redid them after I realised I could get a lot more from my "lightbox" AKA 'My desk lamp bent down almost directly onto the model' by putting the model on an angle so the light hits it directly.

Because, you know, science 101 - light travels in a straight line etc and twit here didn't quite remember that for the last few shots.

Situation resolved! ;)

Anyhow, you may be wondering why the pictures of muddy, cruddy fields?  Well that is because that is the look I am aiming for with the bases on my miniatures... I want them to look like they are in a place that is going through some regular storms.  These kind of storms make a real, real fine (and really... REALLY gluey) mud that sticks to ANYTHING thanks to the fine red silt of the soil.


So my forces, in their imagi-nation not Africa/ not Australia (still NOT sure which exactly it will be!) are fighting in the onset of the "wet season" wherever they will be... it will be wet, it will be muddy... they ain't gonna feel pretty at all!  (Although I hope the painting will be!)


Painting wise, I have completed four stands of DevilDogs to date - two stands of 'Regular' Marines with Green flak jackets, and two stands of the "Marine Raider Regiment" - the reborn MARSOC - to differentiate them, they are using a 'tactical' combat vest... so in reality it just means they have a 'Luftwaffe Blue' vest and helmet cover.

One particular mod I am very happy with has been the creation of what I consider to be a "signature" weapon of the US Marine Corps - the SMAW rocket launcher.  Built around the Israeli B-300 system, the SMAW has been used by the Marines since '85 and looks like it will keep being used for quite some time!

To make the SMAW was a reasonably easy task.  As I am using GHQ's "Modern US Infantry" packages, they come with a surprisingly large number of 'Stinger' MANPADS troops - the Stinger is, at this scale, a dead ringer for the SMAW once you cut off the IFF antennae and lightly file the area flush with the missile tube.  A lick of paint, and no one would know you had modified a different system!

I think it is what will set apart my Marines from any other force, the SMAW is such a distinctive system for their use.

The trees on the bases are branches from a larger scale railway model tree snipped apart - doused in super glue, and then dipped in either a mix of clump foliage/grass or a few different dips straight into the flock grass...  The reason I have done this is that I want the trees to look like the spindly 'Chinee Apple' trees we have throughout the top end of Australia like you see down below. 

They're scrubby, shabby looking... and you never, EVER want to land in one... as a bloke who used to live on a property with these terrible, spiky bloody plants, yeah... just don't!


 I also had some very good luck with my wash (nothing crazy, just a Strong Tone 'Army Painter' wash drop bottle where I only use a drop or two in my paintbrush until it runs out) and the toner sat quite nicely within the facial features of the models... showing up real nicely for the images.

My personal favourites are the DevilDog lining up a target with his SMAW over the top of a patch of scrub, and the Marine Raider lying down with the Minimi/ M-249 SAW.

Next up, some completed Diggers to go with the DevilDogs!


Monday, 22 August 2016

Aussie, Aussie, Aussie!

G'day everyone!

Apologies for the radio silence the last little while, it has been a hell of a ride the last few weeks.  I have had a fair bit of misfortune hit me in my personal life.  However, that has finally been resolved to a point where I now have some time again to myself and can focus on something better than the recent month!

So to celebrate having at least a bit of my life back I've got myself a few new bits and pieces...

Who am I kidding, it's a LOT more than a few bits! 

I recently re-read the 'Oz Invaded' campaign ruleset made by a fellow Aussie gamer called 'Bish', he mostly runs 3mm but he has began to get into 6mm as well - we all have our guilty pleasures right? ;)  He made a really interesting campaign for his fellow pico-armour players which I have used to help inspire me to get out there and re-start building my forces.

I found this to be quite inspirational in getting off my butt and building these Aussie forces;
and here's a link to his page if you want to have a look for yourself!


I also have had more than a little inspiration from fellow Aussie 'Tacobat' - this cat is a painting god, seriously, how the heck he can get a miniature to look how it does blows me away every time! 
A link to his page as well so you too can sit there and be amazed!


Anyway, back to what I am doing.  So following my last posts about my conversion work, I have made some 'Bushmaster' Protected Mobility Vehicles (PMV's - essentially one hell of an uparmoured truck!), some GHQ ASLAV-25's, and a number of CinC LAV-C vehicles with modifications to become ASLAV-PC's - the non-turreted armoured personnel carrier used by our Australian Army Cavalry regiments.


The Bushmasters had a small conversion done to them to give them a remote weapons station like the ones used in Afghanistan (although they also use the normal open top as well)

The weapon system I used was 'gifted' by GHQ's Israeli "Achzarit" heavy APC - it is a 'close enough' copy of the remote system used by our forces.  The Achzarit's will be previewed in a later force being operated by one of my Imagi-nations


To have the metal sit correctly meant cutting the MG away from the GHQ Bushmaster turret hatch, then very gently sanding it back so the remote turret could sit.  It didn't take the super glue well as it is a fiddly attachment, so I used some pigment heavy black-paint as a fixing agent to keep the two pieces together while the glue settled... apart from that little hiccup, it was an easy deal!

The ASLAV-25 is your standard issue GHQ ASLAV-25, they are available for purchase from GHQ right now.  A lovely model straight out of the box and I wouldn't be surprised if more than a few of these get used by USMC players for the extra details!


The ASLAV-C seen here is a hybrid vehicle.  As no-one to date makes the actual ASLAV-PC in 6mm *it has a 'square' troop compartment at the back as per the images below* I had to go with a 'close enough' approach to the design.

Eventually, I settled with using CinC's LAV-C chassis, primarily for "economy of effort" as I could get them as packs of three rather than having to split GHQ LAV-C/ LAV-L packs.  However, the 'Protector' remote weapon system is the same as that used by the US Stryker vehicles, so I bought a number of these weapons kits from GHQ as a parts order alongside my usual orders.


The actual conversion was very easy... if not a little hairy at first!

1. Use a hand-drill to drill a hole at the right size for the weapons systems on the LAV-C.
2. Dry fit - realise the weapons system doesn't sit right with all the smoke grenade launchers.
3. Go back to internet images for cross-referencing, notice that 'our' RWS doesn't have any dang smoke launchers... go back and cut the bottom layer off the GHQ RWS using my Games Workshop pliers (seriously, they make some GREAT pliers...) deciding to leave some on purely for cosmetic reasons.


Dangit!  *Goes for pliers...*


4. It fits!  It fits!!!!  Have a slight giddy chuckle after cutting twelve turrets and actually having the surgery work first time!
5. Paint... now that was the hard part!

The painting for all of these vehicles is my usual mixing style of "When it looks right to me", so do not quote my mix ratios, it is purely an estimate based off what I did.  Getting the look right was quite a choice, as you can see in the two pictures below (and the ones above) the actual "Camo" can really take on any variance of tone or sheen depending on the when/where/what said vehicle has been doing...


Australian Army "Brown/ Desert Red" - VALLEJO Mahogany Brown and Vallejoy Beige - Approximately a 90 Brown/10 Beige ratio.

Australian Army "Green" - VALLEJO Russian Uniform, no change, it looked right out of the bottle.

Australian Army "Black" VALLEJO Black Grey/ German Camo Black Grey / Black... this one literally was a mish-mash as I was never able to get a definitive equal to the glossy/not glossy look the Black gives depending on what light it is in.  I think the final mix was about 80% Black grey, and equal measures German Camo Black Grey and Vallejo Black to try and get a mix of the slight grey/satin black look.

Remote weapon station colours - The RWS on the Bushie is VALLEJO German Camo Beige, and the RWS on the ASLAV-PC is VALLEJO German Camo Dark Green. 

Windows/ Sights/ Lights - The blue of the windows and sight systems is VALLEJO Andrea Blue, the lights on the ASLAVs (and later on the Bushies) are VALLEJO Old Gold.

So there you have it... the beginnings of my Australian Army contigent - Four ASLAV-25's, Twelve ASLAV-PCs and Five *later to expand to ten* Bushmasters.  My force will eventually expand, but I'll follow that in another post.

Anyway, end result... with a few touchups *ASLAV-PC wheels need to be finished etc* I'd say it passes the 'not bad' test from tabletop height! :)