So we've now got the lands of Eulanus - the poor, downtrodden lands that, in my eye, will probably become one of the major battle grounds in the area...
In which case, we're going to need to start adding things for people to fight over, right?
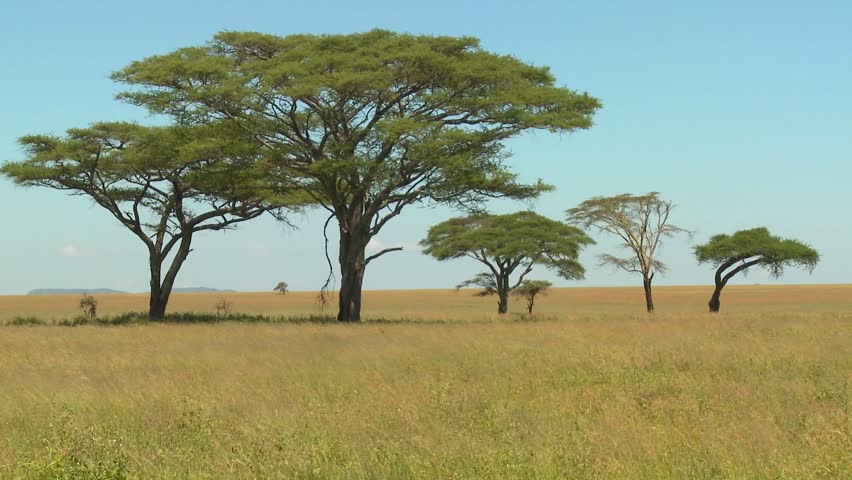
So starts my terrain building for Eulanus. In my eye, Eulanus is a mixture of African and Australian bushland - with a fair mix of more desert and savannah type terrain towards the interior, and a coast that allows for more tropical features, and is the area where a majority of actual societal development occurred.
The example in the real world I am thinking of is my home state of Queensland, where a majority of people live within a hundred kilometres of the coast, and most industry exists there. However, the majority of the state is scrubland, with varying levels of drought throughout the inland.
So you go from these kind of areas:


As this mixture seals, it WILL retract and crack in key points, likely quite considerably. Once the initial coat dries and hardens, re-seal with the builder's putty by itself to smooth out the edges and fill cracks... just as it is meant to do job wise.
 The first is going to be a regular occurrence, a dwelling that can mix it with either Afghanistan or Africa. Eventually, this one will have a few "medicinal plants" growing within this small compound's walls :) This compound is made from two seperate Gamecraft Miniatures 6mm Resin buildings.
 The second example is a prime example of the kind of dwellings I will have over a lot of my African-style boards... small shacks, huts and shanties that are the cramped hovels of the much, much less fortunate. They have seen numerous horrors already, so the horror of war is probably just another day at the office for most! This example comes from JR Minis 1:285 range.
In which case, we're going to need to start adding things for people to fight over, right?
So starts my terrain building for Eulanus. In my eye, Eulanus is a mixture of African and Australian bushland - with a fair mix of more desert and savannah type terrain towards the interior, and a coast that allows for more tropical features, and is the area where a majority of actual societal development occurred.
The example in the real world I am thinking of is my home state of Queensland, where a majority of people live within a hundred kilometres of the coast, and most industry exists there. However, the majority of the state is scrubland, with varying levels of drought throughout the inland.
So you go from these kind of areas:
To, eventually, something like this...
One of the key things I want is the red, iron-rich soil like you find in Australian outbacks and African regions. That will be a distinguishing feature of most of my units conducting this fight in Africa.
As such, to get this blend, I am using the following:
Basecoat with a balck acrylic paint - I don't have a fixed brand, just whatever artist's paint you want. I usually go with a 'wetter' one so it doesn't dry out as fast in the tube.
As such, to get this blend, I am using the following:
Basecoat with a balck acrylic paint - I don't have a fixed brand, just whatever artist's paint you want. I usually go with a 'wetter' one so it doesn't dry out as fast in the tube.
Original coat, earth brown - Vallejo
Drybrush - combination blend (i.e "whatever looks good to me") of Vallejo Cavalry Brown and either a small dose of Iraqi Sand or an Earthen brown colour.
Mix it up, then apply in layers until you have it looking "red" enough for you. In reality, the 'red' dirt is more of an orange, but that does look kind of ridiculous in 6mm.
Nonetheless, here are some 90% completed terrain pieces! They just need some basic flock to look a little more like the African savannah example.
Nonetheless, here are some 90% completed terrain pieces! They just need some basic flock to look a little more like the African savannah example.
As for the bases, I use 1mm plastic card as the base material, cut to shape and then with edges filed smooth. From there, I build up around the miniature buildings with a combination paste made of builder's putty, PVA glue and a dash of model sand to provide grit.
 The first is going to be a regular occurrence, a dwelling that can mix it with either Afghanistan or Africa. Eventually, this one will have a few "medicinal plants" growing within this small compound's walls :) This compound is made from two seperate Gamecraft Miniatures 6mm Resin buildings.
  The second example is a prime example of the kind of dwellings I will have over a lot of my African-style boards... small shacks, huts and shanties that are the cramped hovels of the much, much less fortunate. They have seen numerous horrors already, so the horror of war is probably just another day at the office for most! This example comes from JR Minis 1:285 range.
So that is what I am up to, terrain, terrain and more terrain!
I like your pics that you have taken, also the last two have a similar look to South Africa...., duh. You need to send a round trip no expiration date, or August 4, expiration so I may come down to deliver the micro armor to you, it will save the cost of shipping. We can game some, I'll bring some of my micro armor.
ReplyDelete